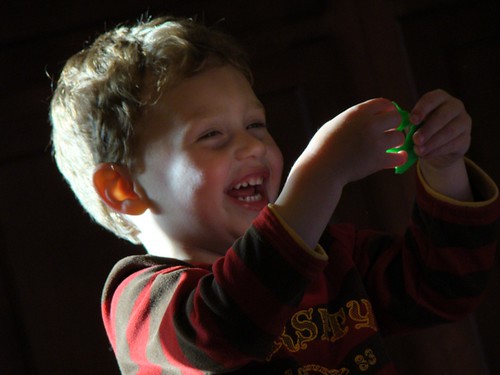
Today I'm participating in I Heart Faces Fix-It Friday. Every week they post a photo and ask participants to give "recipes" for bringing out the best in it. I just couldn't resist this little guy. Plus, I have been working hard at just the issue this photo has--an underexposed subject.

The vast majority of the participants in Fix-It Fridays use Photoshop, and have lots of fancy actions that make photos gorgeous. I'm totally envious. I use a Mac, and while I do have Photoshop Elements, I confess that I still find it overwhelming, and don't have any desire to start messing with downloaded "actions". My Mac-standard iPhoto software is so simple that it's what I keep coming back to. Let's see how it measures up.
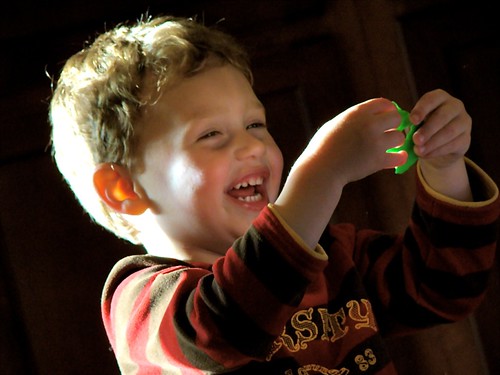
Here is my color version:

My edits were all using the "Adjustments" menu.
1. First to expose the face. I've discovered the treasure of the histogram for dark faces--reduce the midtone levels by dragging the middle arrow to the left. I stopped about 2/3 of the way over. Additionally, I pulled the shadow reduction slider to the right to 5, and reduced the contrast to -40.
2. Once I found the face, I wanted to refine detail: Sharpness 14, De-noise 34
 I took my color edited version, clicked on "Effects", and clicked on B&W. The overexposed part was a little too white, so I clicked twice on edge blur to make it look almost like a special effect. The face was a little too dark again (and still a little darker than I'd like, but to get more light was a quality sacrifice), so I pulled the saturation back down to 50, and increased exposure to 1.02.

3. After I brought the face into the light, the background was also exposed. I love the black background, so I went back to the histogram and dragged the black point (on the left) over to the right to 13% to darken it back up. That's probably my favorite part about the photo (besides that beautiful face)--I love the contrast and light!
4. To enhance the color, I bumped up the saturation to 57 and warmed it up a bit to +10 on temperature. With iPhoto '09 you can check a box to limit saturation on skin tones, which I did.
5. My overall look was still a little darker than I wanted, so I bumped the exposure up to 0.69. Voila!
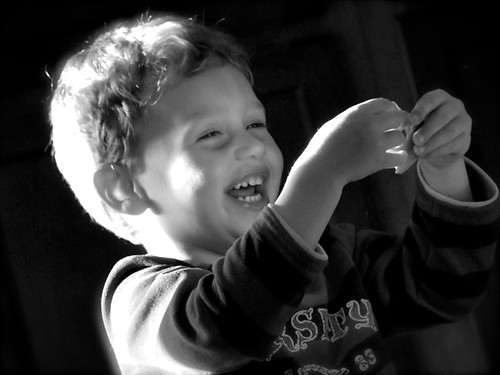
And my black and white version:
 I took my color edited version, clicked on "Effects", and clicked on B&W. The overexposed part was a little too white, so I clicked twice on edge blur to make it look almost like a special effect. The face was a little too dark again (and still a little darker than I'd like, but to get more light was a quality sacrifice), so I pulled the saturation back down to 50, and increased exposure to 1.02.
I have to say...I really love my iPhoto!
UPDATED!:
I went to see how my edits measured up with my Photoshop counterparts, and one thing glared at me (very literally)--the cheek! So I took my edited version to Elements, and used the clone, eyedropper, airbrush and blur tools to play around with that spot, and then the very dark shadow under the eye. I could never in a million years describe what I did though. Still love my iPhoto. ;-)


10 comments:
Ohhhhh I love how you made the gooey stuff look really green!!!!
I have a MAC, and also love my iPhoto! Great Job!
no idea about iphoto, but your edits are wonderful - I actually like the first two better, despite the glaring cheek.
looks great. I really like the version when you cloned the cheek.
What an adorable little subject you are working with.
All these editing tools are amazing. I have Photoshop Element and I'm completely overwhelmed and perplexed by it.
♥
Joy
NEAT! You did a great job with your software... honestly, I wouldn't even worry about learning elements when you can do that!
Okay, now i'm off to read your testimony. I LOVE THAT STUFF!
these look great and i like what you did with the cheek hot-spot. great job!
i have my edits posted, too. feel free to come on over and visit anytime :O)
Well, look at you, Ms. Fancy Pants! You brought out the shadows so nicely...just the contrasts this photo needed, I think!
Beautiful fix! I love what you were able to do with iphoto. You've inspired me to spend some time learning iphoto's editing features. Thanks for sharing the process!
Absolutely loved the B&W picture. I love B&W photos - I need to take more than I do ;o)
You did a great job with the color ones, too, of course, but the B&W is my weakness!
Post a Comment