
Today we are talking about backgrounds, including that fancy word bokeh (BO kuh) that means the part of your photo that is out of focus. If you are following these tutorials of mine, I hope you had a chance to check out this post about depth of field (DOF) that I linked to last time. Darcy does an excellent job of diagramming exactly what it is. If you understand depth of field, what I am writing today will make more sense to you. If you want even more details, I recommend this tutorial which highlights several factors that affect the depth of field, and therefore the appearance of your photo. All of that said, my goal in this post is to help you use the background in your photo to your advantage, regardless of how well you understand the technical aspects, and regardless of what camera you are using.
Today I am shooting with my beloved old point and shoot, the Panasonic Lumix DMC-TZ3. They are a dying breed, quite literally. Mine is five years old, and has taken thousands upon thousands of pictures. It really does NOT want to focus anymore, especially close up or zoomed in. That said, it did a pretty good job for me today! It worked best on the macro ("flower") setting, which typically allows you to focus closer to your subject.
Today I am shooting with my beloved old point and shoot, the Panasonic Lumix DMC-TZ3. They are a dying breed, quite literally. Mine is five years old, and has taken thousands upon thousands of pictures. It really does NOT want to focus anymore, especially close up or zoomed in. That said, it did a pretty good job for me today! It worked best on the macro ("flower") setting, which typically allows you to focus closer to your subject.
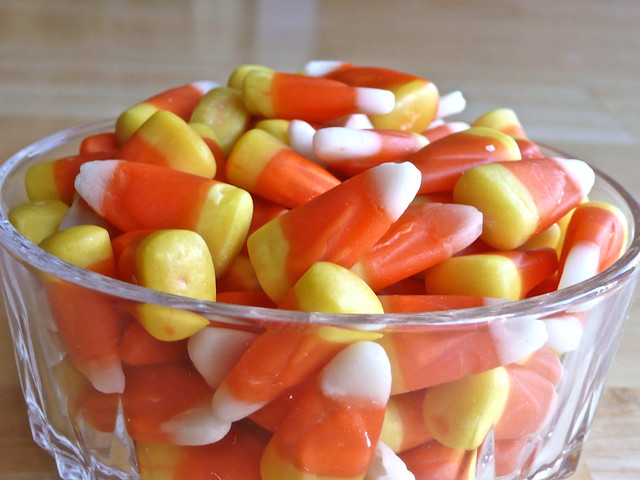
Today I am shooting candy corn, because it's colorful, it screams fall, and it's what I have on hand.
(But not for long.)
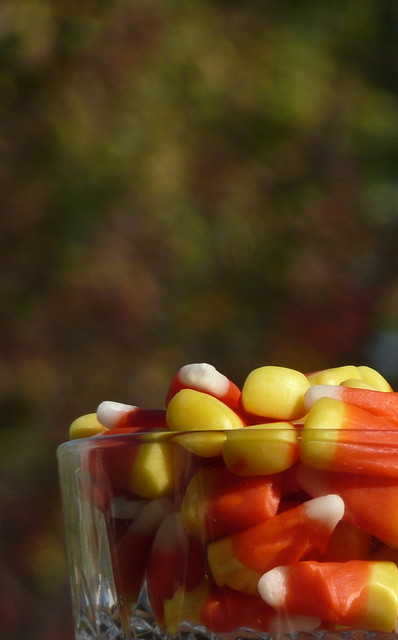
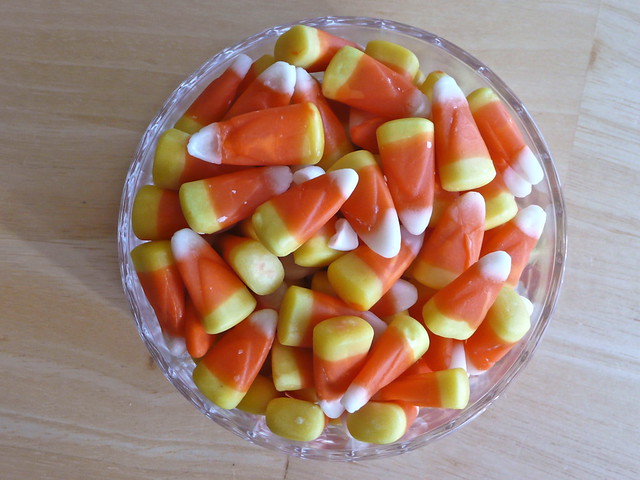
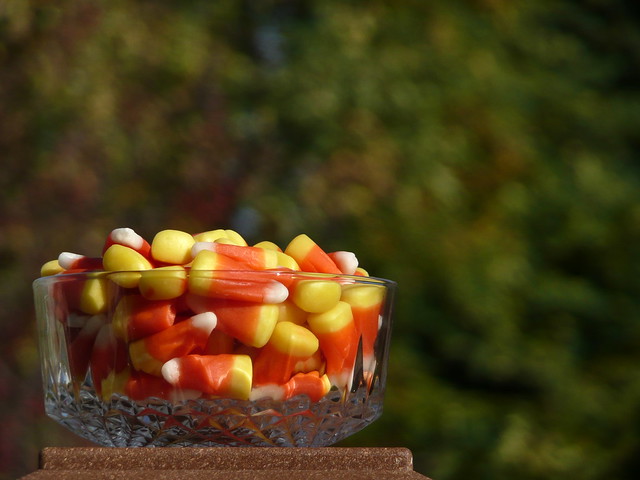
In this first shot I am above the candy corn (not above eating it, lest there be any confusion), shooting straight on, camera lens parallel to the surface of the candy corn. Everything is in focus, because there is very little variation in how far away the pieces, and even the table, are from the camera. Depth of field is not a factor in this photo. It's not very interesting, but it has potential.
Ahh, that's better! It's the same photo, just cropped. I love it!

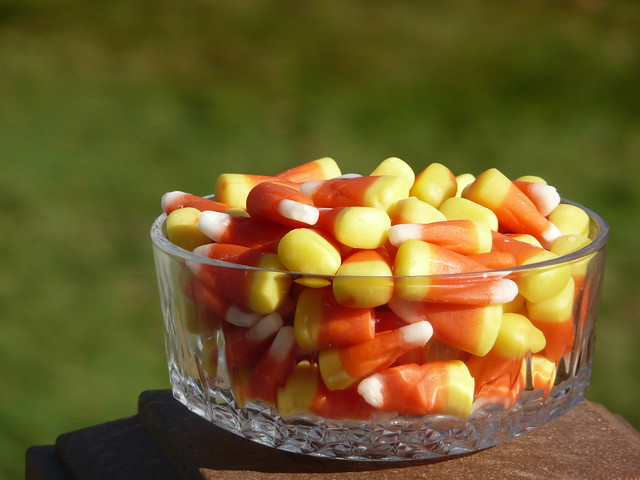
This perspective from the side adds the factor of depth. I've mentioned before that
close subject+far away background=more bokeh (the out of focus parts of the photo)
Now I will tell you that
close subject+greatest amount of zoom+far away background=MOST bokeh
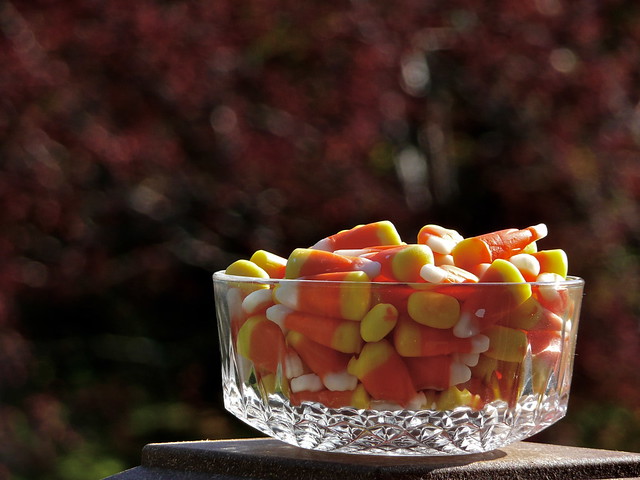
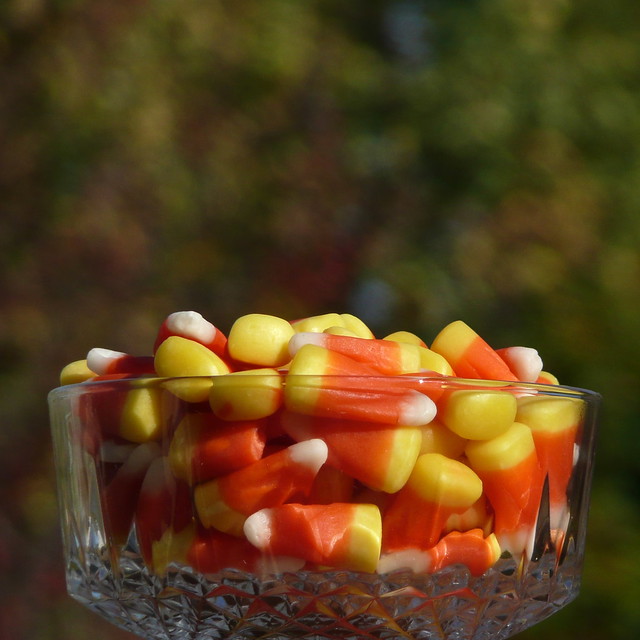
Here I zoomed in as much as I could and got as close as I could to the candy corn as the camera would allow without failing to focus. The candy corn in the very back is now just a tiny bit out of focus, which adds dimension to the shot, and the messy background is as blurry as it can get. Here's where my DSLR is a huge advantage, because it can put a blur on that background that makes it unrecognizable--but we're all about doing the best with what we have, a.k.a. "Rock what you've got!"
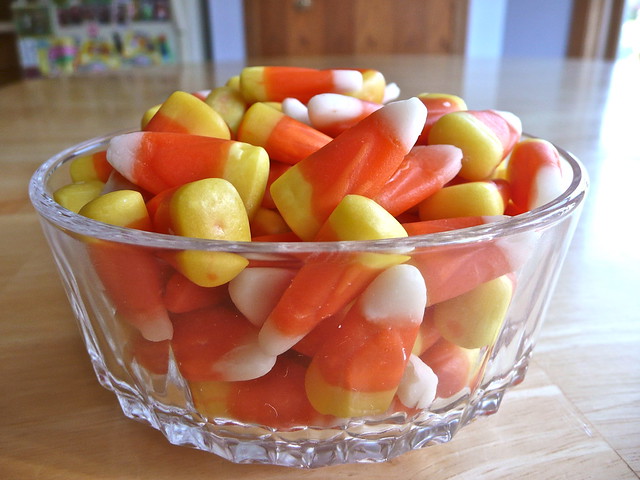
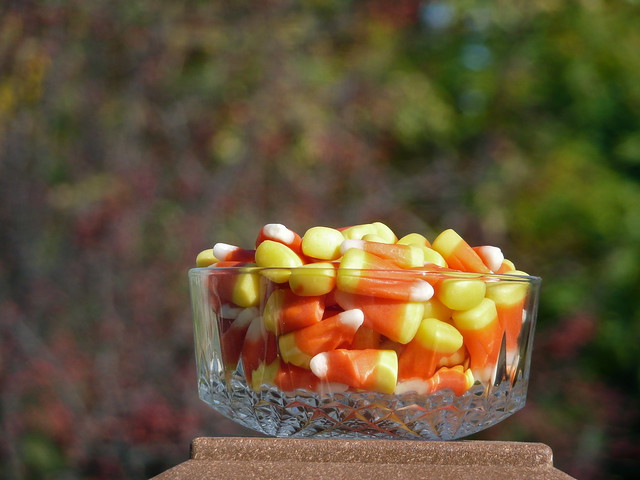
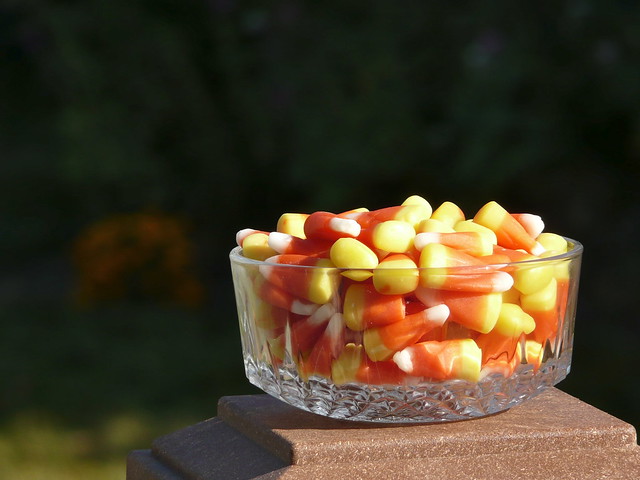
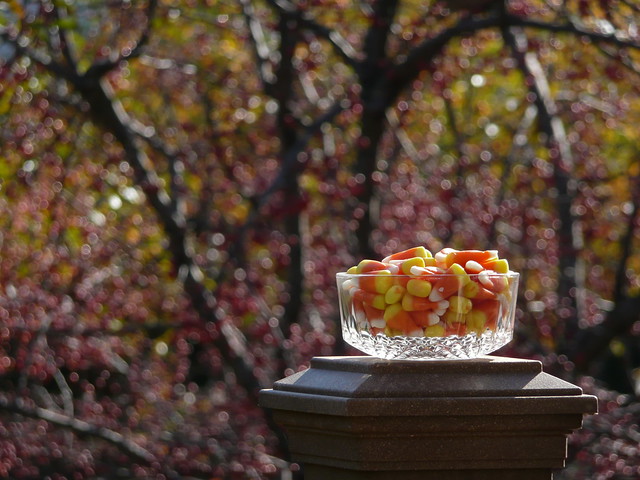
That messy background is not my friend, no matter how blurry it gets, so here I changed my angle to eliminate it altogether. There's not much blur here, but blur is really not a good goal for me with this setup, since I can't zoom in more, and I can't get farther away from my background. I've now eliminated my bad background, but if I'm willing to work at it, I can find a setup where the background is both attractive and farther away.
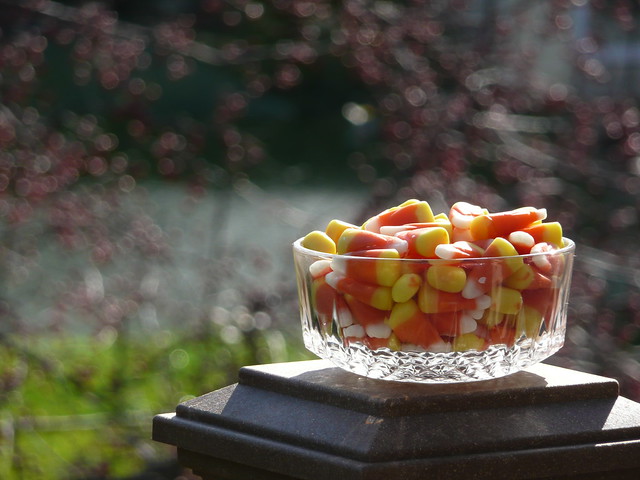
My backyard is beautiful right now, in several directions. I was able to try out a wide variety of backgrounds, a long way away from the deck railing post to increase the bokeh. Not only was the background far away, but I could get farther away from the candy corn and use my zoom to get in close. Big difference from inside, right? Wow!
My shots were turning out a little over-exposed in the bright sunlight. I especially wanted deeper color in the background. So I used the MOST IMPORTANT (in my opinion) control on my point and shoot camera to fix it:
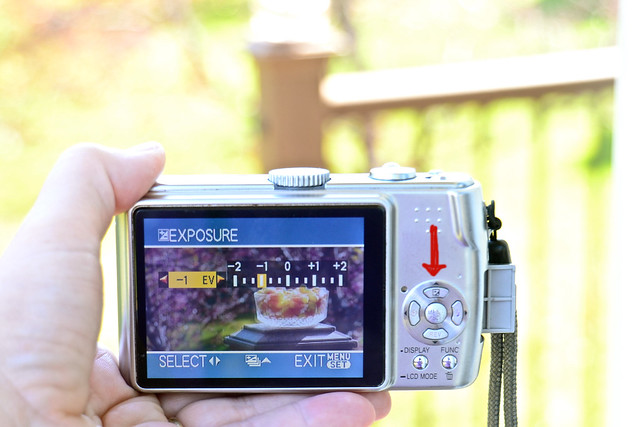
Exposure compensation.
Somewhere on your camera there is a button with a little +/- on it. If you don't know where it is, you must, MUST find it! I pushed the +/- button on my selector wheel, and up popped this exposure selector. I scrolled to the left (some are the opposite, some go up and down) to decrease the exposure. This tool is fabulous for either darkening or brightening your photograph to adapt to the light situation. If your camera has both an auto setting and a P (program) setting, you might need to use P in order to make adjustments like this. Check your manual for more information about your setting choices.
The down side to using exposure compensation to brighten your photo in dark lighting is that the farther you try to adjust up the scale, the more likely you are to have blur due to movement (your hands or the subject) and also the lower your image quality will be. If you are darkening a too bright situation, watch out for creating dark shadows on faces--it's worth having your background too bright if you are trying to expose a human subject well. That's a post in itself. But still. Use exposure compensation.
That's better.
So now, you can choose your bokeh.
Colored leaves.
Red crab apples.
Evergreens with hint of remaining marigolds.
Over here, there was light dancing off the crab apples. When I first saw it I didn't frame the candy corn well. You shape your bokeh by the angle you choose. This is a great example of an angle that isn't well thought out.
Here we go. Still bouncing light, but a much better angle.
This tree is much closer than the backgrounds above, so the bokeh has more detail and less blur--
but, it is a beautiful background! Blur isn't always the be-all and end-all.
but, it is a beautiful background! Blur isn't always the be-all and end-all.
Once you choose your favorite, background, you can balance the subject and background as you wish.
That gets into composition. Which is another post for some other time.

6 comments:
Thanks for sharing. I am sitting looking at every shot you have done. Wow!
A couple of weeks ago. I tried too hard. Then another shot not thinking it went okay.
It seems to be hit and miss.
Like you say. I either get my subject too close and it blurs .Or I get the background blurr and it looks dreadful.
I guess practice makes perfect but I am looking at your camera and as you say. Some have sideways to look or up. My booklet instructions are hopeless. Not any explantory like you.
Gosh those in the dish looks good.Yummier.
I am sitting here looking at all your phot shots. You r hubby is a card like mine.
My hubby brought me in a leaf and I see you have a leaf. Interesting.
I love to get my eyes inot your photography. I have you on my fav bar above so I can just click you on each day to see what you have taken.Instead of going into my blog friends. There you are. I have loved photography at age 10.Yet I still have not got the background perfected yet.
Thank you!!
Goodheavenstobetsy, what on earth is 'candy corn'? It looks like the extracted teeth of monsters! Monsters that have been feasting! Possibly on little children! Goodness gracious!
Ha Kate! I suppose maybe that's what it's supposed to look like since it comes out around Halloween. It's a fall tradition that goes back to my own childhood and beyond. It's in stores everywhere and it's addictive! I can leave it alone unless it's mixed with peanuts for a salty sweet taste. Then I would eat all of it, if my family weren't so glad to help me.
Tracy, here's what I'll take away, "close subject+greatest amount of zoom+far away background=MOST bokeh" Now practice is necessary. Thank you!
By the way, I love candy corn too but I can't find bags of it that don't say that they were manufactured around peanuts.... oh well.
Post a Comment